
I got a message from Amazon saying that my hardware was being scheduled for removal. I did some Googling and found that I needed to migrate my ghost blog instance over to a new T2.Micro instance. Which meant I basically needed to create an AMI of my existing instance, and then create a new instance off of that AMI.
I recorded the steps I followed in hopes of saving someone else the trouble of stumbling through it.
- Log into the Amazon EC2 Console
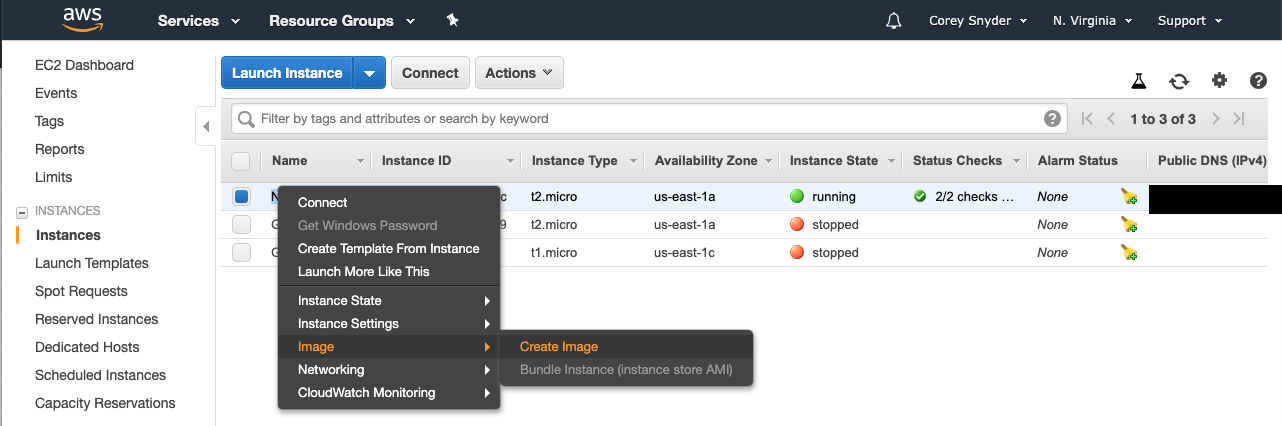
- Right click on my instance > Image > Create Image. Use Default settings
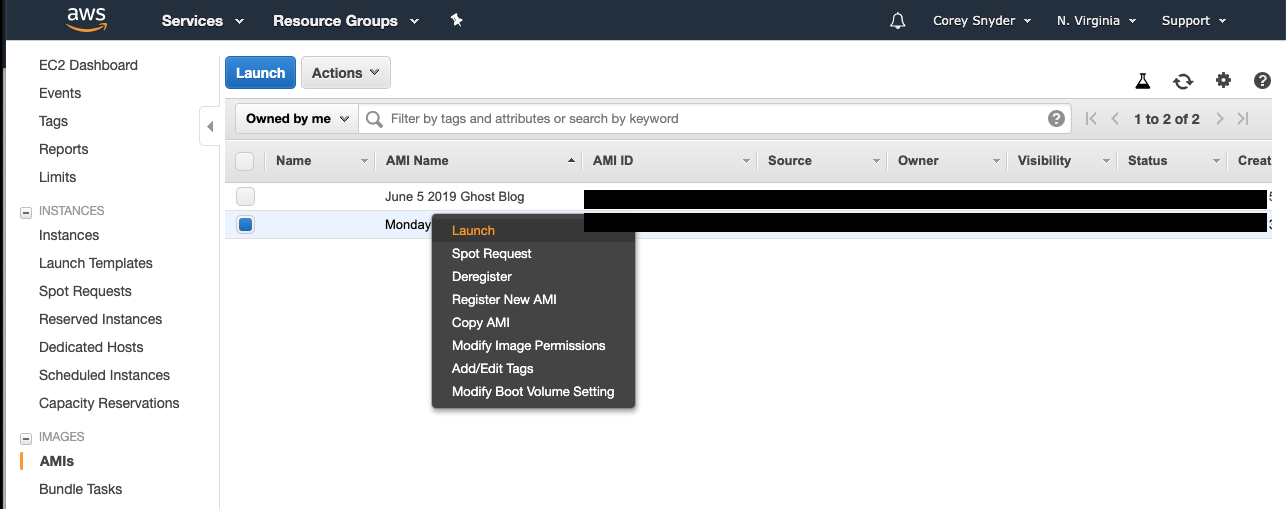
3. Go to AMIs on the left and right click on your new AMI and select launch. Use default settings
4. This should bring up your new instance which will be identical to your old instance. You can SSH into this box to verify that it is as expected.
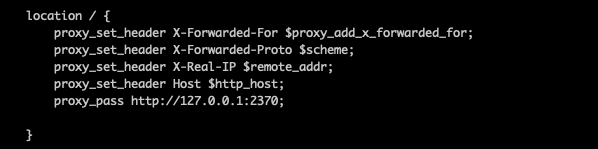
5.A. You may need to update your Nginx configuration in order to point to the right port which your ghost blog runs on.
Update 6/6: I just realized there's a much easier way to do this. Just cd into the directory of your ghost instance and run ghost setup nginx and it'll create the nginx configurations required to point to your ghost blog.
The hard way: To figure out what port your ghost blog is running on, ssh into the box, cd into the directory where your ghost blog is running and type ghost status

You can see that its running on port 2370.
5.B. Now you need to vim /etc/nginx/sites-available/your-config-file
5.C. Now restart nginx. I do this with
sudo su
service nginx reload
6. But wait there's more... At this point your Instance should be configured as it should, but if you hit your public IP it's not going to work. At least it didn't for me. This left me scratching my head 🤔. I didn't even get the default Nginx landing page. This was because I did not have the right inbound security rules in place.
Bounce back over to your instances list and scroll to the right to find the Security Groups column.
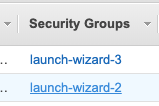
Click on the link for the right row and it'll take you to that security group definiton. From there you need to look @ the bottom and click the Inbound tab. Then click Edit and add the HTTP and HTTPs rules where necessary.
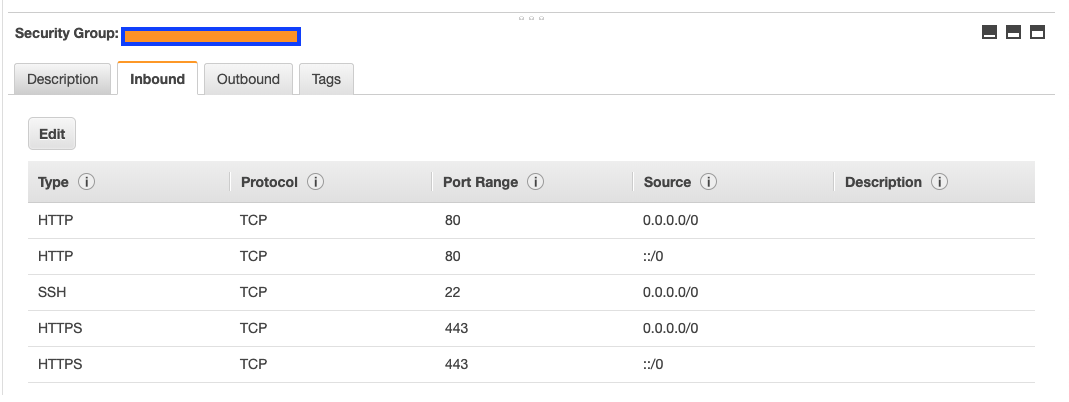
Ok, now at this point if you hit your public IP you should get your blog, or at least an Nginx landing page. If your nginx config's server config isn't setup to route the public IP address, your site still won't load.
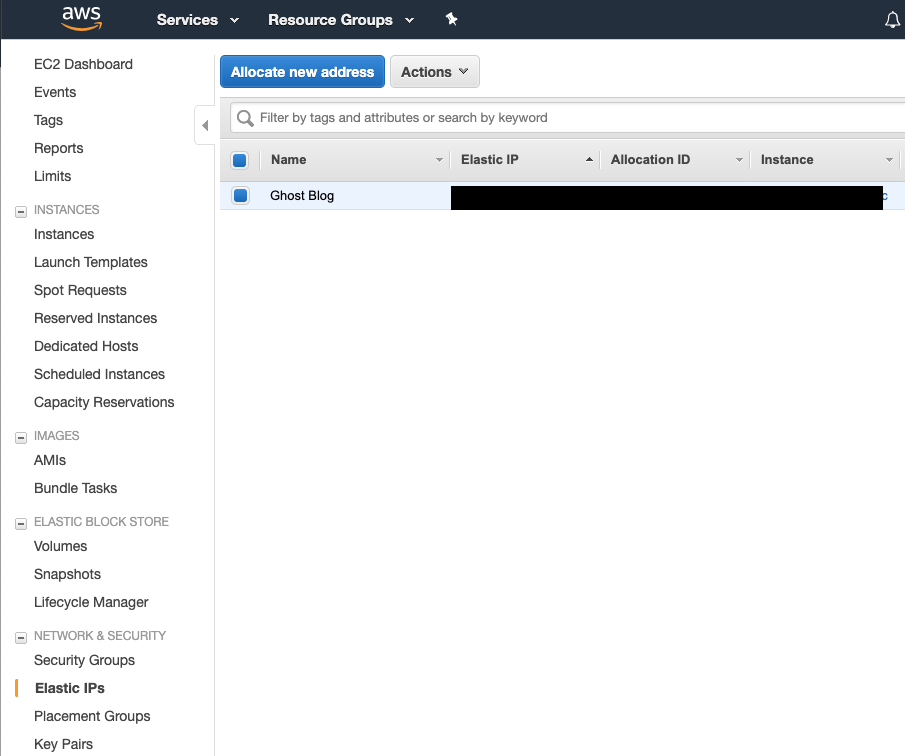
7. The last step is to reallocate your Elastic IP over to your new instance. Click over to Elastic IPs page in the Amazon console and you should see your elastic IP. Right click on it and choose to Associate Address. Choose your new instance and save. At this point hitting your Domain should point to the ghost blog. If you run into issues SSH back into the box and run ghost restart to restart the instance. I had to do this, though I'm not sure why.
If you don't use an Elastic IP, you'll need to get the public IP of your instance and go to your Domains's DNS config and point the record to the new instance public IP address. It'll take a bit of time for the DNS config to go live so give it some time after this change.
